How We Got Digital Cinema Quality From the FS5; or James Franco in S-LOG
The Sony PMW-FS5 has a wide range of shooting options. Just google “FS4 Picture Profiles” and you’ll find yourself sifting through an overwhelming amount of possibilities. As the in-house Cinematographer at BFD Productions I plan how we're going to shoot each project that comes our way. We purchased the FS5 Summer of 2016 and one of my favorite things about this camera is the versatility.

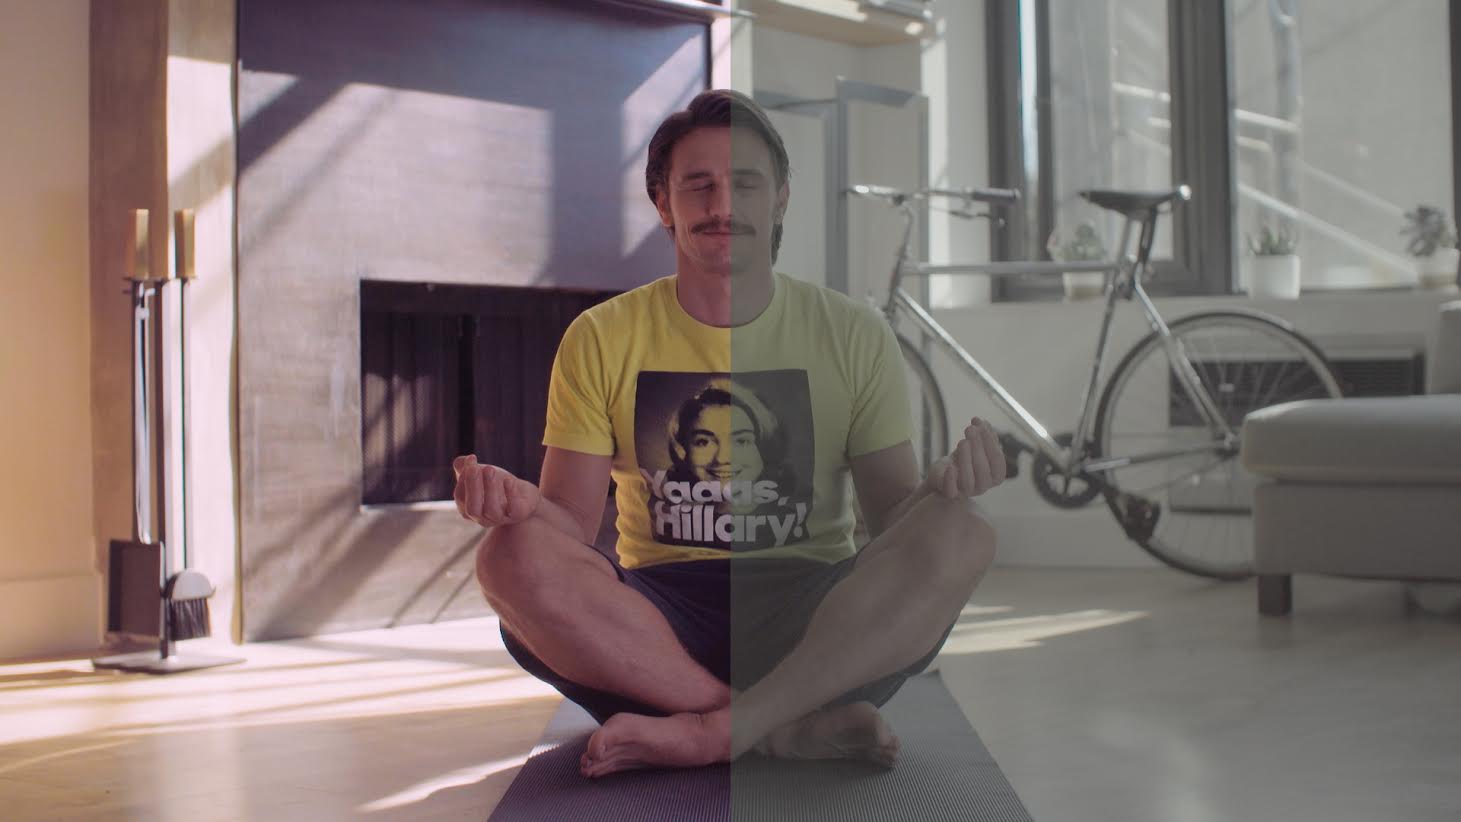
A month before the 2016 Election we were contracted to shoot a spot starring James Franco to support the Hillary Clinton campaign. We wanted to pull out all the stops, but we it just made sense to use the camera we just obtained instead of renting a camera package. I had shot a few things S-Log in the past and ran into the noise issues you’ll hear about from many users on the web. Knowing there was more to this camera than I knew just yet, I decided to give S-LOG a second chance. Of all that went into making this, I wanted to share 3 of the things I did that really made this come together visually for us using our FS5 and shooting S-Log.
First, as previous Canon users we have the Metabones Speedbooster adapter for EF lenses and used the Canon CinePrimes with our FS5. This is a no-brainer if you own Cinema glass or if you work with it often, but if you’re coming from the doc world that we work often in, it’s important to set aside your various photo lenses and spring for proper cinema glass when a more commercial or cinematic look is desired.
Second, we shot with the S-LOG-2 GAMMA and the S-GAMUT3.CINE COLOR MODE. There is a lot to read up on the differences between S-LOG-2 and S-LOG-3. On the day and once we had lights up, I made my final decision the way I always do. By eye. If you can, shoot a bit of your set up with a stand-in using the profiles your considering. Load them up on a computer and view it full screen while adjusting color and looking for the discrepancies in your image. Also, do your research. I’ve linked to some helpful articles below. An important trick to getting the best image out of S-LOG with the FS5 though is to over expose by 1-1.5 stops.

Third, I shot in the XAVC-HD Codec. ALWAYS choose this over 4k with the FS5 if you plan on doing anything in a grade, and especially if you’re using S-LOG settings. I am a sucker for color depth, so just for fun I also went ahead and converted all of our final shots into Pro-Res 444 at maximum bit-depth, and maximum quality before we did the grade. Some will say this is an extraneous step, but when it’s a short project I like to do this. You can’t actually increase your resolution, but this method ensures that every pixel is effected in your final grade.

This experience with the FS5 only scratches the surface of the pros and cons of what can be done with that camera. If you are an FS5 owner considering shooting S-LOG it’s important that you consider your approach and workflow, especially if you’re used to a more conventional digital content approach. Get the right glass, know how you want to grade it, and make sure you have enough light. Just because you’re getting more stop of dynamic range out of S-LOG does not mean you should shoot that profile in low-light situations.
Make every pixel count!

Watch all the final videos here!
Just a few of the articles I read before deciding my settings
http://www.xdcam-user.com/2016/01/log-is-a-poor-choice-for-low-light/
https://www.sony.co.uk/pro/article/broadcast-products-FS5-shooting-tips